
- 1. Four Settings tabs
- 2. Glossary
- 3. Website settings - step by step
- 4. CMS accounts for the team
- 5. Security enforce - understand before enabling
- 6. MCP inside CMS - basics
- 7. Security practices
- 8. Compared with other tools
- 9. Technical limits
- 10. Common issues
- 11. Tips
- 12. Self-check - series G wrap-up
Appifio Creator · Lesson G05 · Intermediate → Advanced
site mode, team accounts, security & MCP
Series G wrap-up: configure the whole site in one place, grant team access, and turn on MCP from the CMS panel - without returning to Creator for every task.
Learning goals: Configure site info, switch to maintenance mode, add CMS accounts for staff, and understand Security enforce.
Reading time: about 17 minutes
Prerequisites: Superadmin in Aura CMS (G01); can open /your-link-name/cms.
Previous → next: G01 → G05 → G06 (Site AI Agent) · H02 (full Aura MCP)
1. Four Settings tabs
2. Glossary
| Term | Meaning | Where in the UI |
|---|---|---|
| Site mode | Live / Maintenance / Upgrade - visitors see a temp page; admins still use CMS | Website settings → Status group |
| Editor / Administrator / Superadmin | CMS role labels - map to user/admin/superadmin at the API layer | CMS accounts → role dropdown |
| Security enforce | Master switch; off = current behavior; on = apply per-entity view/submit rules | Security → "Enable CMS security controls" |
| Enable MCP integration | Allows the MCP gateway to access the site-editing sandbox | MCP tab |
| List with ids / Single config block | CMS labels for indexed / flat (F05) when showing storage type | Security - storage-type column |
| URL routes | Public paths for blog, shop, cart, contact | Website settings → URL group |
3. Website settings - step by step
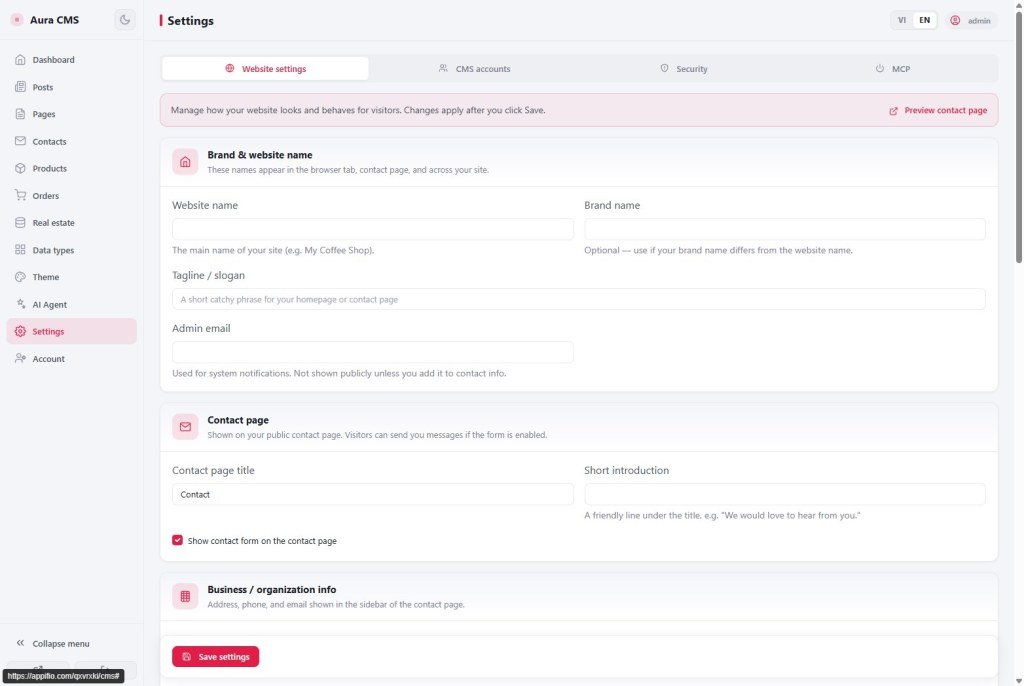
- CMS → "Settings" → "Website settings".
- Brand & website: Site name, Brand name, Tagline, Admin email - often shown in footer/contact.
- Contact page & Organization: title, intro; toggle contact form; address, phone, public email.
- Site status:
- Live - normal for visitors.
- Maintenance - pick a maintenance page; visitors see the notice; you keep CMS access.
- Upgrade - similar to maintenance, different visitor label.
- Blog & date/time: show author at post end; date/time format and timezone.
- URL routes: blog, shop, cart, contact, category/tag/product/page prefixes - update site menus if you change paths.
- Save (usually "Save settings") → wait for success.
- Check the live site in a private window - CMS reflects published state.
4. CMS accounts for the team
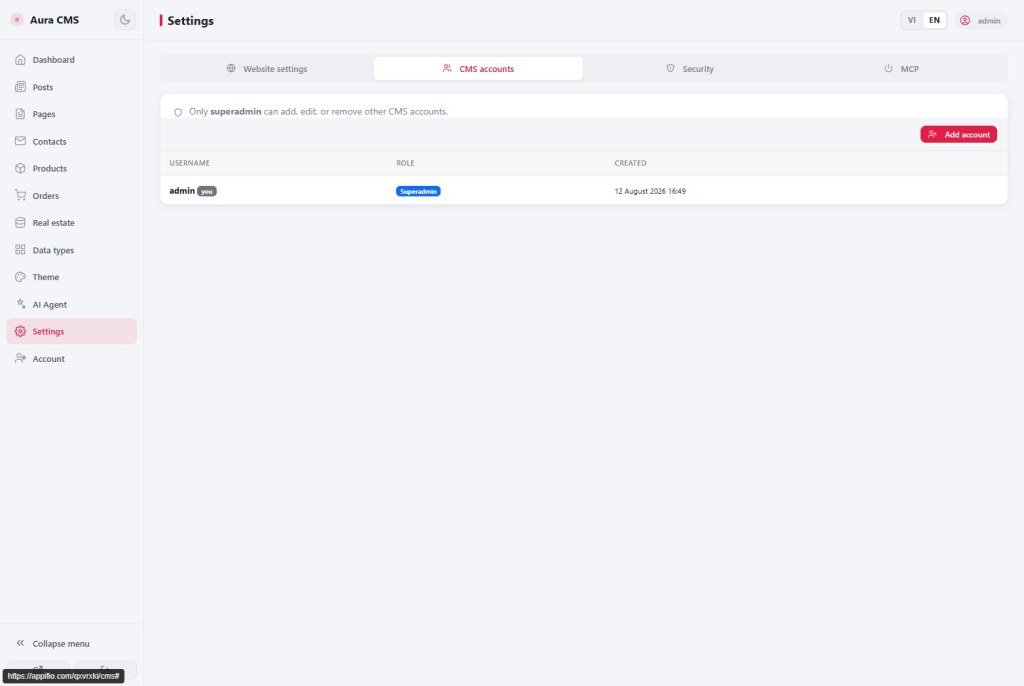
- Tab "CMS accounts" - note: "Only superadmin can add/edit/delete other CMS accounts."
- "Add account" → username, password, role.
- Pick the right role:
- Editor - daily posts/products (API role
user). - Administrator - shop, orders, normal settings (API role
admin). - Superadmin - full power including Security and MCP - only 1-2 trusted people.
- Editor - daily posts/products (API role
- Save → sign in as the new account in a private window to verify their menu matches the role.
5. Security enforce - understand before enabling
- Tab "Security" → "Enable CMS security controls". When off, behavior stays as today.
- When on, configure four columns per entity (contacts, products, orders, custom…):
| Column | Meaning |
|---|---|
| Who can view? | Public / Public published only / CMS admins only |
| Who can create? | Guests may submit (forms/orders) / CMS admins only / Fully off |
| Record filter (guests) | e.g. Published only - guests never see drafts |
| Fields visible to guests | Pick columns guests may see - others stay hidden |
6. MCP inside CMS - basics
- Tab "MCP" in CMS Settings - same ideas as H02, different entry (CMS instead of Creator).
- Turn on "Enable MCP integration" → gateway becomes ready.
- "Create / resume session" - new sandbox session or continue if still valid.
- "Create token" - copy the time-limited token for an external IDE (Cursor, VS Code…).
- "Download Appifio Aura MCP package (.zip)" - unzip and follow the README.
- "Save MCP state" before closing the tab.
- Full IDE flow, expired token/zip → lesson H02.
7. Security practices
- Only superadmin saves Security and MCP - don’t share superadmin with content staff.
- MCP tokens expire - treat like temporary passwords; don’t paste into public chat/email.
- When offboarding staff, delete or change their CMS password immediately.
8. Compared with other tools
- WordPress: maintenance-mode plugins ≈ Site mode; Admin/Editor/Author ≈ the three CMS roles.
- Firebase Security Rules: same “who can read/write” idea; here it’s UI forms, not rule code.
- Notion team permissions: similar role-based access for team members.
9. Technical limits
You can
- Switch Live ↔ Maintenance
- Add CMS accounts with 3 roles
- Configure Security enforce per entity
- Enable MCP + create token from CMS
- Change blog/shop/contact routes
Limits
- Security/MCP tabs - full edit for superadmin only
- Site mode doesn’t lock CMS - only hides the site from visitors
- MCP tokens expire - recreate when needed
- Wrong Security enforce can break guest forms
- No automatic forgot-password for CMS
10. Common issues
| Situation | Fix |
|---|---|
| Enabled Security enforce; guest forms stopped | Check “Who can create?” for that entity - set back to “Guests may submit” |
| Maintenance on but CMS still works | By design - site mode hides from visitors, doesn’t lock the admin panel |
| Staff don’t see Security/MCP | Expected - those tabs are superadmin-complete |
| Shop route changed; menu links still old | Update Appearance menu (G04) or custom HTML menus in Creator |
| MCP token expired; IDE disconnected | MCP tab → Create token → update IDE config (H02) |
11. Tips
- Unsure about Security enforce? Leave it off until you truly need stricter rules - don’t break a working guest form.
- Before handing the app to a client, create an Editor for them; keep Superadmin for the technical side.
- Switch to Maintenance before big off-hours changes so visitors don’t see a half-broken site.
- Record new blog/shop routes after changes - content teams need the new URLs.
12. Self-check - series G wrap-up
- Can you switch Site mode to Maintenance and back to Live?
- Have you added an Editor account and signed in successfully?
- Do you know Security enforce only applies when on, and is per entity?
- Do you know the CMS MCP tab leads to the full flow in H02?
- Have you toggled Security enforce (or on a test entity) to see the effect on guest forms?
Next lesson
G06 - Site AI Agent: enable the public visitor chatbot
Nav AI Agent (not Settings): turn on the live-site chat bubble. IDE MCP remains H02; full webapp checklist is H01.
Internal navigation (same language)
Appifio Creator · User guide · G05
