
Appifio Creator · Lesson C06 · Intermediate
professional image editing inside Creator
No need to open Photoshop or Canva separately - crop, adjust color, remove backgrounds, erase objects, and add effects right in Appifio Creator, then save the result for your pages.
Learning goals: Open Photo Editor from Media/Inspector, use the right tools (crop, color, AI background/object removal), and save edited images to your project.
Reading time: about 13-17 minutes
Prerequisites: Basic Inspector skills (C03) and at least one image in the project.
Previous / next: ← C03 (Basic Inspector) · → D01 (Files tab - Files & Media Library)
Main UI labels: Edit · AI Magic · Crop · Color · Effects · Filters · Draw · Remove background (AI) · Upscale/Sharpen (AI)
1. Workflow map
2. Terms in this lesson
| Term | Meaning | Where you see it |
|---|---|---|
| Edit | Button that opens Photo Editor for a specific image | Hover an image in the Files tab |
| AI Magic | AI tools: remove objects, expand image, remove background, upscale/sharpen | First tab in Photo Editor |
| Paint over object | Brush a mask over the area AI should erase | AI Magic → Remove object |
| Remove background (AI) | Strip the image background; output as transparent PNG | Button in the Background tab |
| Upscale/Sharpen (AI) | Increase detail/resolution with AI (Real-ESRGAN) | Button in Color/Effects tab |
3. Open Photo Editor
From the Files tab (Media Library): hover an image in the grid - the "Edit" button appears. Click it to open Photo Editor for that image.
From Inspector: select the image element on the preview; the right panel lets you open Photo Editor directly for the displayed image without leaving the page.
If you see "Photo Editor module is loading. Please try again in a moment." - wait a few seconds and reopen; the image module is heavy and needs time on first load.
4. Main tool groups
| Tool | Main features |
|---|---|
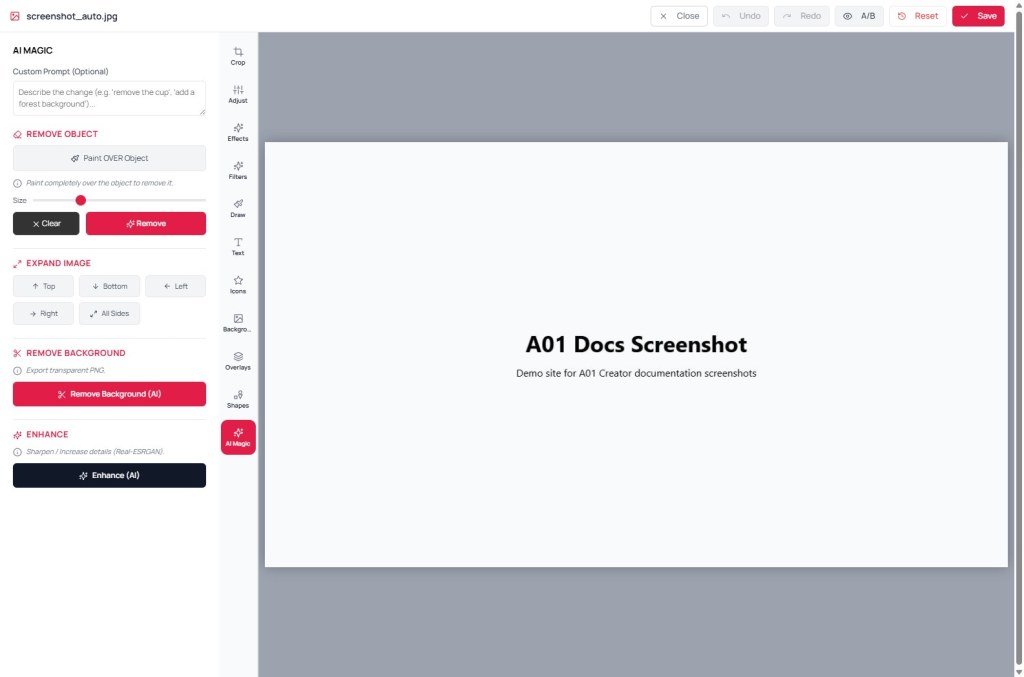
| AI Magic | Remove object (paint mask), Expand image (Top/Bottom/Left/Right/All sides), Remove background, Upscale/Sharpen - optional "Custom request" field for extra instructions |
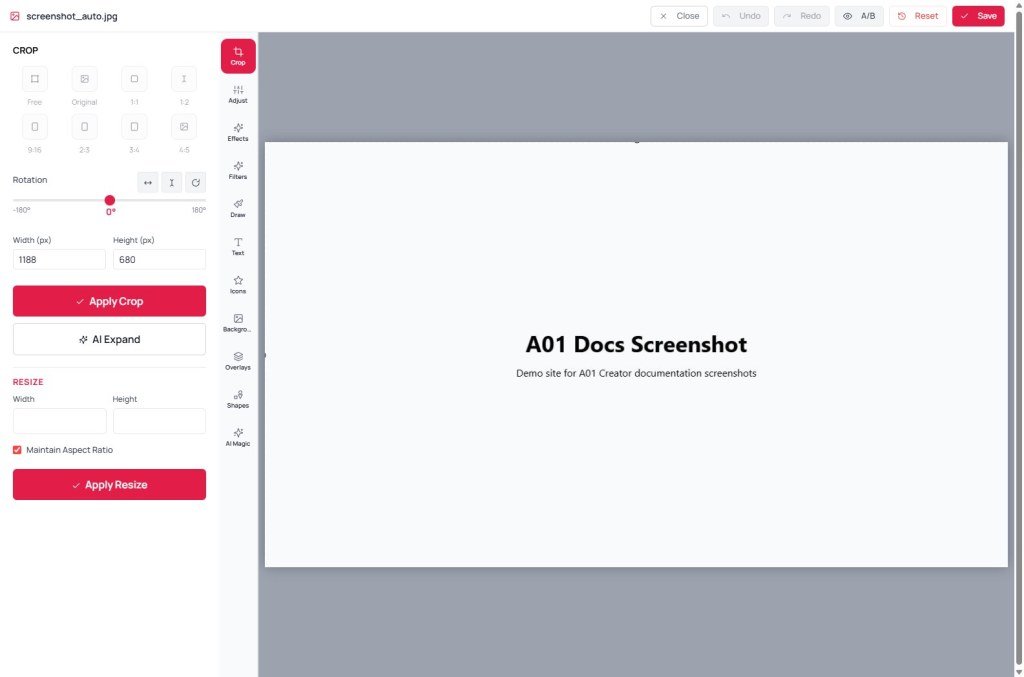
| Crop | Ratios Free/Original/1:1/1:2/9:16/2:3/3:4/4:5, Rotate, Flip horizontal/vertical, Width/Height (px), "AI Expand" when crop cuts off content |
| Color | Brightness, Contrast, Saturation, Color temperature, Exposure, Gamma (red/green/blue), Tint |
| Effects | Sharpness, Blur, Pixelate, Grain, Sepia, Emboss, Color blend, Duotone |
| Filters | ~18 built-in filters: Clarity, Classic, Lomo, Sunrise, Nostalgia, Hemingway… |
| Draw | Enable draw mode, choose brush type, color, brush width |
| Text / Shapes / Icons / Background / Overlay | Add text, shapes, icons, change background, add color/gradient overlays on the image |
| Resize | Enter new dimensions, tick "Keep aspect ratio", click "Apply Resize" |
5. AI Magic - remove object example
- Open the AI Magic tab → choose "Remove object".
- Click "Paint over object", adjust "Size" of the brush, and cover the object completely (UI hint: "Cover the object completely to remove it.").
- Optionally type in "Custom request (Optional)" - e.g. "remove the cup", "add a forest background".
- Click "Remove now". Use "Clear mask" to repaint if you selected the wrong area.
- If you hit the monthly limit, the system shows: "You have reached your monthly AI image limit ({used}/{limit}). Please upgrade your plan."
6. Comparison with popular tools
| Tool | Similar | Difference |
|---|---|---|
| Canva | Similar filters, text, shapes, and crop | Photo Editor lives in your project - edit and use on the page without export/import loops |
| Photoshop (Generative Fill) | AI object removal and image expansion | Photo Editor is simpler, tuned for web/page images - no advanced layer/mask workflow like Photoshop |
| remove.bg | AI background removal, transparent PNG output | No need to leave Creator for an external service |
7. Technical limits
You can
- Edit images inside the project without external tools
- Remove objects, remove backgrounds, and upscale/sharpen with AI
- 30+ built-in color/effect/filter tools
You cannot
- AI features (object removal, background removal, upscale/sharpen) have monthly usage limits by plan
- Replace complex layer/mask workflows from dedicated desktop apps
- First open in a session may require waiting for the module to load
8. Common issues
| Issue | What to try |
|---|---|
| Photo Editor won’t open, shows "loading" | Wait a few seconds and retry; if it still fails, reload Creator |
| Hit monthly AI image limit | Use non-AI tools (Crop, Color, Filters) instead, or upgrade your plan |
| Edited image but the page didn’t update | Confirm you saved in Photo Editor, then still click "Save changes" on the toolbar to push live |
9. Smart usage tips
- Crop/resize oversized images before upload - pages load faster and you use less storage.
- Prefer Remove background (AI) over hunting for transparent PNGs online - faster and uses your original photo.
- Use limited AI features (object removal, background removal, upscale/sharpen) selectively - save them for your most important images.
10. Self-check checklist
- Can you open Photo Editor from both the Files tab and Inspector?
- Have you tried at least one AI tool (Remove background or Remove object)?
- Do you remember to click Save changes after editing an image?
Next lesson
D01 - Files tab: upload, soft/hard delete, Media Library
Manage all project files and images: folder tree, uploads, organization, and the full delete lifecycle from soft delete to permanent removal.
Internal navigation (same language)
Appifio Creator · User guide · C06
