
Appifio Creator · Lesson D01 · Intermediate
upload, soft/hard delete & Media Library
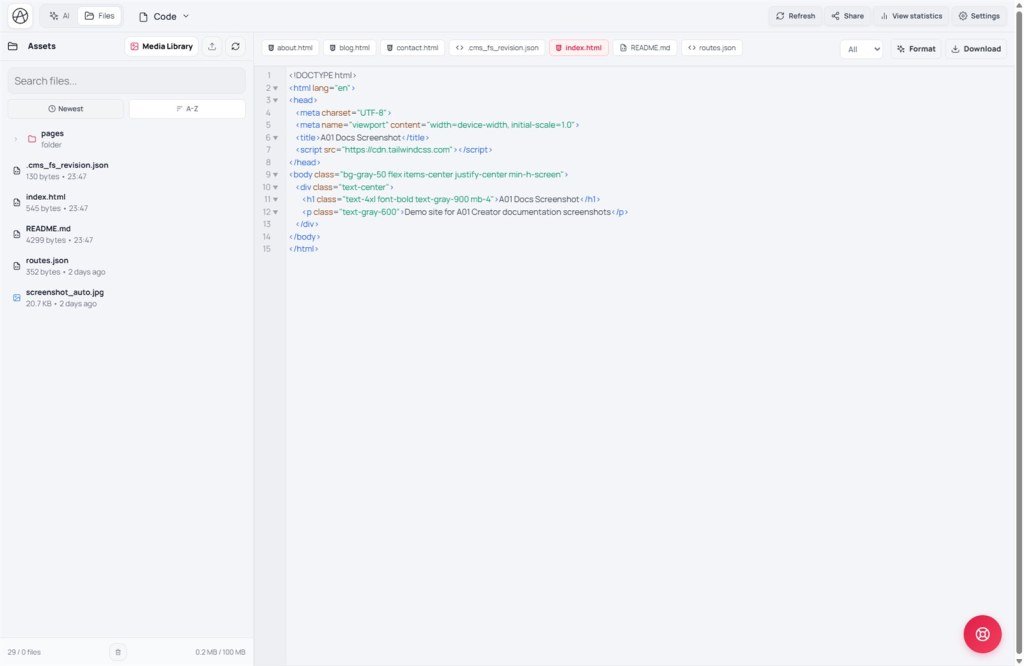
The Files tab is where you manage every HTML/CSS/JS/image file in the project. This lesson covers uploading images to the right place, organizing the media library, and the difference between soft delete (recoverable) and permanent delete (gone).
Learning goals: Upload images correctly, find files fast, understand soft delete → restore → permanent delete, and know the project’s file-count / storage limits.
Reading time: about 14-18 minutes
Prerequisites: At least one project open in Creator (A01-A02).
Previous / next: ← C05 (Add blocks & Template library) · → D02 (Routes)
Main UI labels: Files · Library (Media Library) · Upload image · Newest · A-Z · Show deleted files · Delete permanently · Restore file
1. Workflow map
2. Glossary
| Term | Meaning | Where in the UI |
|---|---|---|
| Files | Tab that manages every project file | Top tab bar in Creator |
| Library (Media Library) | Modal for uploaded images/media - different from the HTML file tree and from the sidebar Libraries tab (Images stock / Fonts / Libraries CDN, D03) | (1) Inside Files · (2) Library toolbar button on preview · (3) Open Media Library in Project profile |
| Upload image | Pick image files from your machine into the project | Files tab / Media Library toolbar |
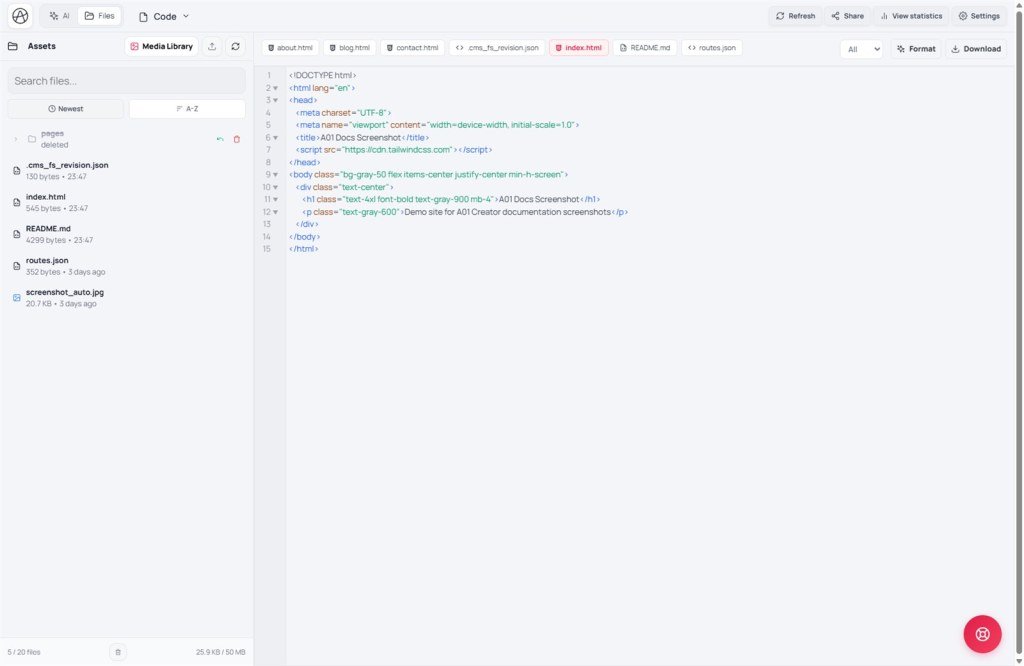
| Soft delete | Delete file / Delete folder - marked deleted but data remains; can restore | Trash icon beside each file |
| Permanent delete | Delete permanently - removed from project storage; cannot undo | Only when Show deleted files is on |
| Restore | Bring a soft-deleted file/folder back to normal | Restore file / Restore folder |
3. Browse and find files
The Files tab shows a folder tree. Use Search files… to filter by name when the project has many files - faster than scrolling a large tree.
A green dot means the file changed but isn’t saved yet - click it to review the diff before you keep or discard.
4. Upload images & Media Library
Three entrances to the same Media Library:
- Files tab → Library area/button (Media Library modal, My library…).
- On View space: toolbar button labeled Library (media) - open quickly while editing without leaving preview.
- In Project profile: Open Media Library to attach Logo/Docs/Assets (B06).
- Click Upload image, pick files from your machine. Only valid image types; wrong type: Please select an image file.
- Sort by Newest or A-Z.
- Click an image → Image details: name, size, URL · Copy URL · optionally Edit opens Photo Editor (C06).
Don’t confuse labels: Sidebar tab Libraries has 3 subtabs: Images (Stock - Pixabay/Pexels/Unsplash, D03) · Fonts · Libraries (CDN). Toolbar Library (media) inside Files = uploaded images & assets. Upload into Media Library - chat attachments are only for AI reference.
5. Soft delete, restore, permanent delete
| Action | Confirm / result |
|---|---|
| Delete file | “Are you sure you want to delete file '{name}'?” - soft delete, recoverable |
| Delete folder | “…delete folder '{name}' and everything inside?” - soft-deletes the whole subtree |
| Show deleted files | Toggle to see soft-deleted files/folders again |
| Restore file/folder | Back to normal; usable immediately |
| Delete permanently | “…permanently delete file/image '{name}' from project storage?” - cannot undo |
Warning: “Delete permanently from Database” for data files is also one-way - only when you’re sure you won’t need that file again.
6. File count & storage limits
Each project has plan limits:
- File count: at the cap you’ll see “File limit ({limit}) reached. Please delete some files before uploading.”
- Storage size: “Storage limit ({limit} MB) reached. Please delete some files before uploading.”
7. Compared with popular tools
| Tool | Similar | Different |
|---|---|---|
| WordPress Media Library | Dedicated image library, sort by date/name | Creator also manages real source files (HTML/CSS/JS), not media only |
| Google Drive | Soft delete to trash before permanent delete | Creator doesn’t auto-purge by time - you must permanent-delete yourself |
| Webflow Assets | Copy image URL for use in code/CSS | Creator surfaces file/storage limits clearly in error messages |
8. Technical limits
You can
- Restore soft-deleted files/folders
- Search and sort Newest/A-Z in Media Library
- Copy image URLs for reuse across the site
You can’t
- Restore after Delete permanently
- Upload past plan file-count or storage limits
- Always rename in place - sometimes you create a new file and re-point routes/links
9. Common issues
| Issue | Fix |
|---|---|
| Deleted an image by mistake | Turn on Show deleted files → find it → Restore file before anyone clicks Delete permanently |
| Preview doesn’t show the new image | Check for a green dot (unsaved) - save the file before judging preview |
| Upload blocked by a limit | Permanently delete unused files/images to free space, or upgrade the plan |
10. Tips
- Name files clearly and keep folders tidy from day one - searches stay easy as the project grows.
- Only Delete permanently when you’re sure - prefer soft delete and re-check after a few days.
- Watch storage if you use many high-res images; compress/resize in Photo Editor (C06) before upload to stay under the limit.
11. Self-check
- Can you upload an image to Media Library and Copy URL?
- Can you tell Delete file (soft) from Delete permanently?
- Have you restored a soft-deleted file once?
- Do you know where limits show up when you hit them?
Next lesson
D02 - Routes: map friendly URLs → HTML files
Attach clean URLs (like /about) to the right HTML files in the Routes tab, following the built-in 5-step guide.
Internal navigation (same language)
Appifio Creator · User guide · D01
