- 1. End-to-end biolink workflow
- 2. Terms for building a biolink
- 3. Step by step - finish a complete biolink
- 4. Features that keep a biolink clean and consistent
- Why biolinks should be mobile-first
- Consistent icons via Libraries
- AI + Inspector in the right order
- 5. Compared with Linktree / Beacons
- 6. Technical limits - what you can and cannot do
- 7. Security when a biolink collects information
- 8. Common issues
- 9. Practical tips
- 10. Check that you understand B02
Appifio Creator · Lesson B02 · Level: Beginner
in one sitting
An end-to-end flow: start from a prompt or Template, check Canvas Mobile, polish copy and images with Inspector, then Save changes and share the link - no coding required.
Learning goals: Finish a personal/brand biolink page, verify it on mobile, refine details with Inspector, and publish safely.
Hands-on time: about 45-60 minutes for a complete biolink.
Prerequisites: A01-A03, B01 (prompts and View & edit).
Previous lesson: B01 - First AI chat.
Next lesson: C01 - Preview workspace: Standard vs Canvas.
Key UI labels you will see:
1. End-to-end biolink workflow
2. Terms for building a biolink
| Term | Meaning | Where it appears in the UI |
|---|---|---|
| Biolink | A single, vertical page that gathers your main social and contact links | Not a separate UI label - the product type you are building |
| Templates | Ready-made UI shells by category (Personal, Business…) | "Templates" tab |
| Canvas | Artboard preview with side-by-side device sizes | Toggle in "View & edit" |
| Mobile breakpoint | Phone-width preview frame, default 390px | Breakpoint control in Canvas |
| Inspector | Click-to-edit for text, images, links, and CSS | "Inspector" in "View & edit" |
| Libraries | Where you enable icon sets (Font Awesome…) for link buttons | "Libraries" tab |
| Share | Copy the public biolink URL to send out | Top toolbar button |
3. Step by step - finish a complete biolink
- Step 1 - Choose how to start:
- Path A - Prompt: in "Chat" mode, send something like: "Create a personal bio page for [role], with a circular avatar, name, one-line intro, 4-6 social link buttons, color tone [describe]" then click "Send".
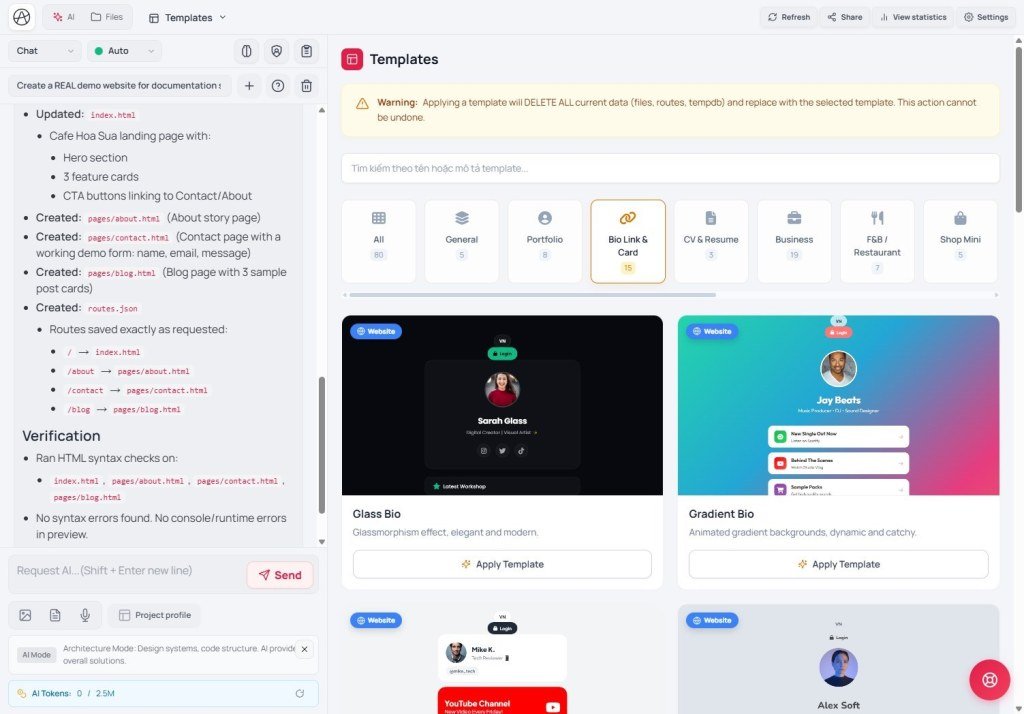
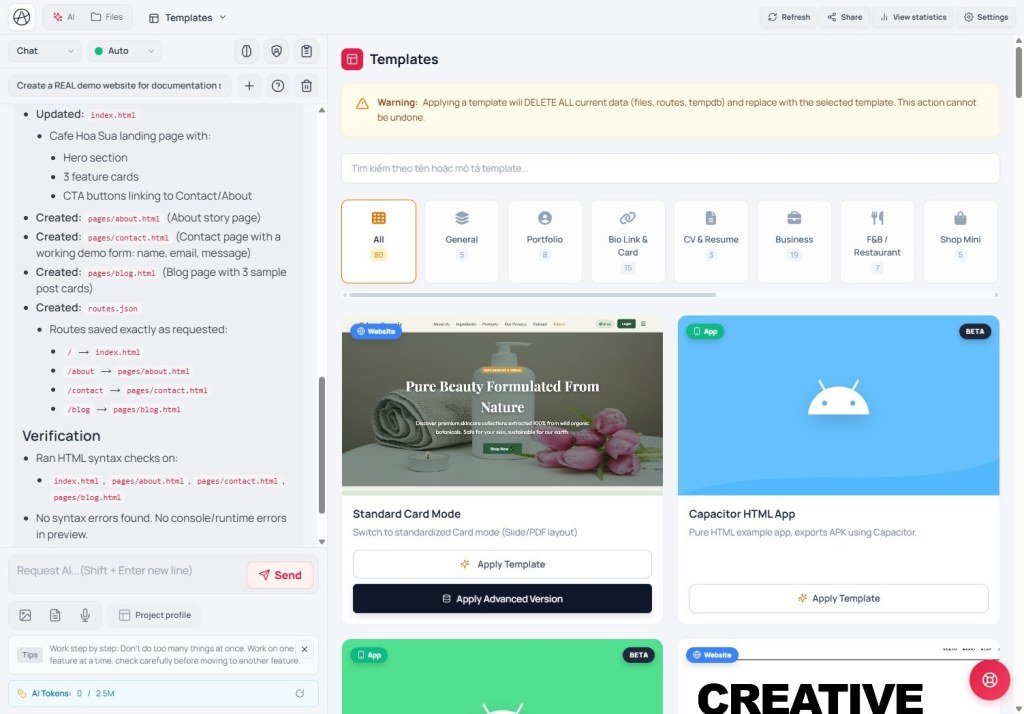
- Path B - Template: open "Templates", pick "Personal", preview, click "Apply design template" (read the warning: it wipes all project files, URL routes, and temporary project data if the app already has other content).
- Step 2 - Open Canvas Mobile: "View & edit" → "Canvas" → "Mobile" breakpoint. This is the primary view - most people open biolinks on phones.
- Step 3 - Turn on Inspector and fix the photo: click "Inspector", select the avatar, replace the image (upload or Media Library).
- Step 4 - Edit copy: click name/title and the short bio - type your real content over the placeholders.
- Step 5 - Fix each link button: click each social button, set the real URL (Instagram, Facebook, WhatsApp, website…) and matching icon; remove or add buttons if the count differs from the template.
- Step 6 - Check Standard: leave Canvas and review overall layout in "Standard" so nothing looks skewed.
- Step 7 - Compare Current/Changes: confirm everything looks right in "Changes" before publishing.
- Step 8 - Save changes: click "Save changes" on the top toolbar.
- Step 9 - Share: click "Share", copy the live URL, paste it into your Instagram/TikTok/Facebook bio.
4. Features that keep a biolink clean and consistent
Why biolinks should be mobile-first
Biolinks are almost always opened from social bios on phones. Canvas lets you edit directly in a 390px frame instead of guessing from desktop and hoping it shrinks correctly - fewer broken button wraps and cropped avatars on mobile.
Consistent icons via Libraries
If the template uses Font Awesome icons, make sure that icon set is In use on the "Libraries" tab - if it is off, link icons may not render. Enable it and save that tab before tuning icons in Inspector.
AI + Inspector in the right order
Use AI for overall layout and button count (large work). Use Inspector for your real links, copy, and photos (personal details the AI cannot invent correctly). Reversing the order - hand-tuning first, then asking AI to redesign - often wipes that hand work.
5. Compared with Linktree / Beacons
| Criterion | Linktree / Beacons | Appifio Creator |
|---|---|---|
| How you build | Drag-and-drop button lists inside a fixed shell | AI can invent free layouts (not only a vertical button list) + Inspector for details |
| Visual customization | Limited themes; custom CSS often paid | Real HTML/CSS via AI/Inspector/Code - not locked to a theme catalog |
| Click analytics | Built-in analytics dashboards (stronger on paid plans) | No built-in click dashboard - add measurement yourself (e.g. Google Analytics) via Libraries or ask AI to wire it |
| Growing into a full site | Hard - product is specialized for a single link page | Easy - same Creator can add Routes, extra pages, and Backend later |
6. Technical limits - what you can and cannot do
You can
- Fully free layouts - no hard cap on buttons, structure, or effects.
- Verify the Mobile breakpoint accurately before publishing.
- Add a contact/lead form later if needed (see F02 when the biolink must capture leads).
You cannot / still limited
- No built-in click analytics board like Linktree Pro.
- Re-applying another Template after hand edits wipes all project files, URL routes, and temporary project data - no smart merge.
- Switching icon libraries may require AI/Inspector to fix each button manually.
7. Security when a biolink collects information
- If you add a contact/signup form, store submissions in Aura Storage (Backend tab) - do not let the AI write customer emails/phones into public HTML files.
- Avoid putting personal phone/email directly on the page if you are not ready for public exposure - prefer moderated channels (WhatsApp Business, a gated form…).
8. Common issues
| Situation | What to do |
|---|---|
| Buttons look fine on desktop but wrap badly on phone | Check the "Mobile" breakpoint in Canvas from the start - do not polish only in Standard/desktop. |
| Icons missing - empty boxes | Open "Libraries", confirm the icon set (Font Awesome…) is "In use" and saved. |
| Applying a new Template wiped hand edits | By design (warned before apply) - create a Version Clone before trying another Template so you can roll back. |
| Social links go to the wrong page | In Inspector, select the button, check the link field in the side panel, set the full URL (including https://). |
9. Practical tips
- Always verify Mobile first - biolinks live mainly on phones.
- Keep 4-6 primary links; too many buttons dilute clicks on the most important one.
- Put the highest-priority action (book, buy) right under the intro - not at the bottom.
- Once stable, create a Checkpoint or Version as a “known-good” save before any big redesign.
10. Check that you understand B02
- Why check the "Mobile" breakpoint before Save for a biolink?
- When should you use AI vs Inspector in this flow?
- What is risky about re-applying a Template, and how do you protect yourself?
- Compared with Linktree, what are Creator’s strengths and weaknesses for biolinks?
- Your biolink is done - what should you learn next to master the preview workspace?
Next lesson
C01 - Preview workspace: Standard vs Canvas
You will go deeper on pan/zoom, when Canvas is disabled (Android Mock), and how to use Standard/Canvas well for any page type - not only biolinks.
Internal navigation (same language)
Appifio Creator · User guide · B02 · Based on Creator preview, Canvas breakpoints, and Templates product behavior
